The Reverse Workflow: Building Design Systems in Code with AI
Traditional design-to-code starts in Figma, then moves to code. A code-to-design workflow builds the design system directly in code, generating documentation from the implementation. With AI tools like Cursor, this approach is faster and more flexible.
The Traditional Design-to-Code Workflow
The standard process:
- Design in Figma
- Extract design tokens
- Hand off to developers
- Implement in code
- Maintain sync between design and code
Problems:
- Design and code drift apart
- Handoff friction
- Static documentation
- Slower iteration
The Code-to-Design Approach
Build the design system in code first, then generate documentation from it.
Step 1: Define Design Tokens in Code
Start with CSS variables and Tailwind configuration:
:root {
    --primary: 14 93% 63%;
    --primary-foreground: 164 86% 66%;
    --background: 180 0% 100%;
    --foreground: 180 0% 2%;
    --radius: 0.5rem;
    /* ... more tokens */
}
These tokens become the source of truth. They support theming (light/dark) and are type-safe when used with TypeScript.
Step 2: Build Components with Tokens
Components consume tokens via Tailwind classes:
const buttonVariants = cva(
    'inline-flex items-center gap-2 justify-center font-medium',
    {
        variants: {
            variant: {
                primary: 'bg-primary text-primary-foreground',
                secondary: 'bg-secondary text-secondary-foreground',
            },
            size: {
                sm: 'h-8 px-3 text-sm',
                md: 'h-9 px-4 text-base',
            },
        },
    }
);
Components are composable, type-safe, and consistent.
Step 3: Generate Live Documentation
Create a design system page that reads from your code:
const colors = [
    { name: 'Primary', token: 'primary', class: 'bg-primary' },
    { name: 'Secondary', token: 'secondary', class: 'bg-secondary' },
    // Automatically generated from your tokens
];

const DesignSystemPage = () => {
    return (
        <div>
            {colors.map(color => (
                <ColorSwatch
                    name={color.name}
                    token={color.token}
                    className={color.class}
                />
            ))}
        </div>
    );
};
This page stays in sync with your code.
Why This Works Better with AI Tools
Rapid Iteration
With Cursor (or similar tools), you can:
- Generate design tokens: “Create a color palette with primary, secondary, and accent colors”
- Build components: “Create a button component with variants for primary, secondary, and ghost”
- Iterate quickly: “Make the primary color more vibrant” → instant update
Single Source of Truth
The code is the design system. No manual sync between Figma and code.
Dynamic Documentation
The design system page updates automatically as you change tokens or components.
Better Developer Experience
- Type safety with TypeScript
- Autocomplete for design tokens
- Immediate visual feedback
- Version control for design decisions
Real-World Example: LLMTalk’s Design System
In LLMTalk, the design system is built entirely in code:
- Design tokens in globals.css (CSS variables)
- Tailwind configuration mapping tokens to utilities
- Components using class-variance-authority for variants
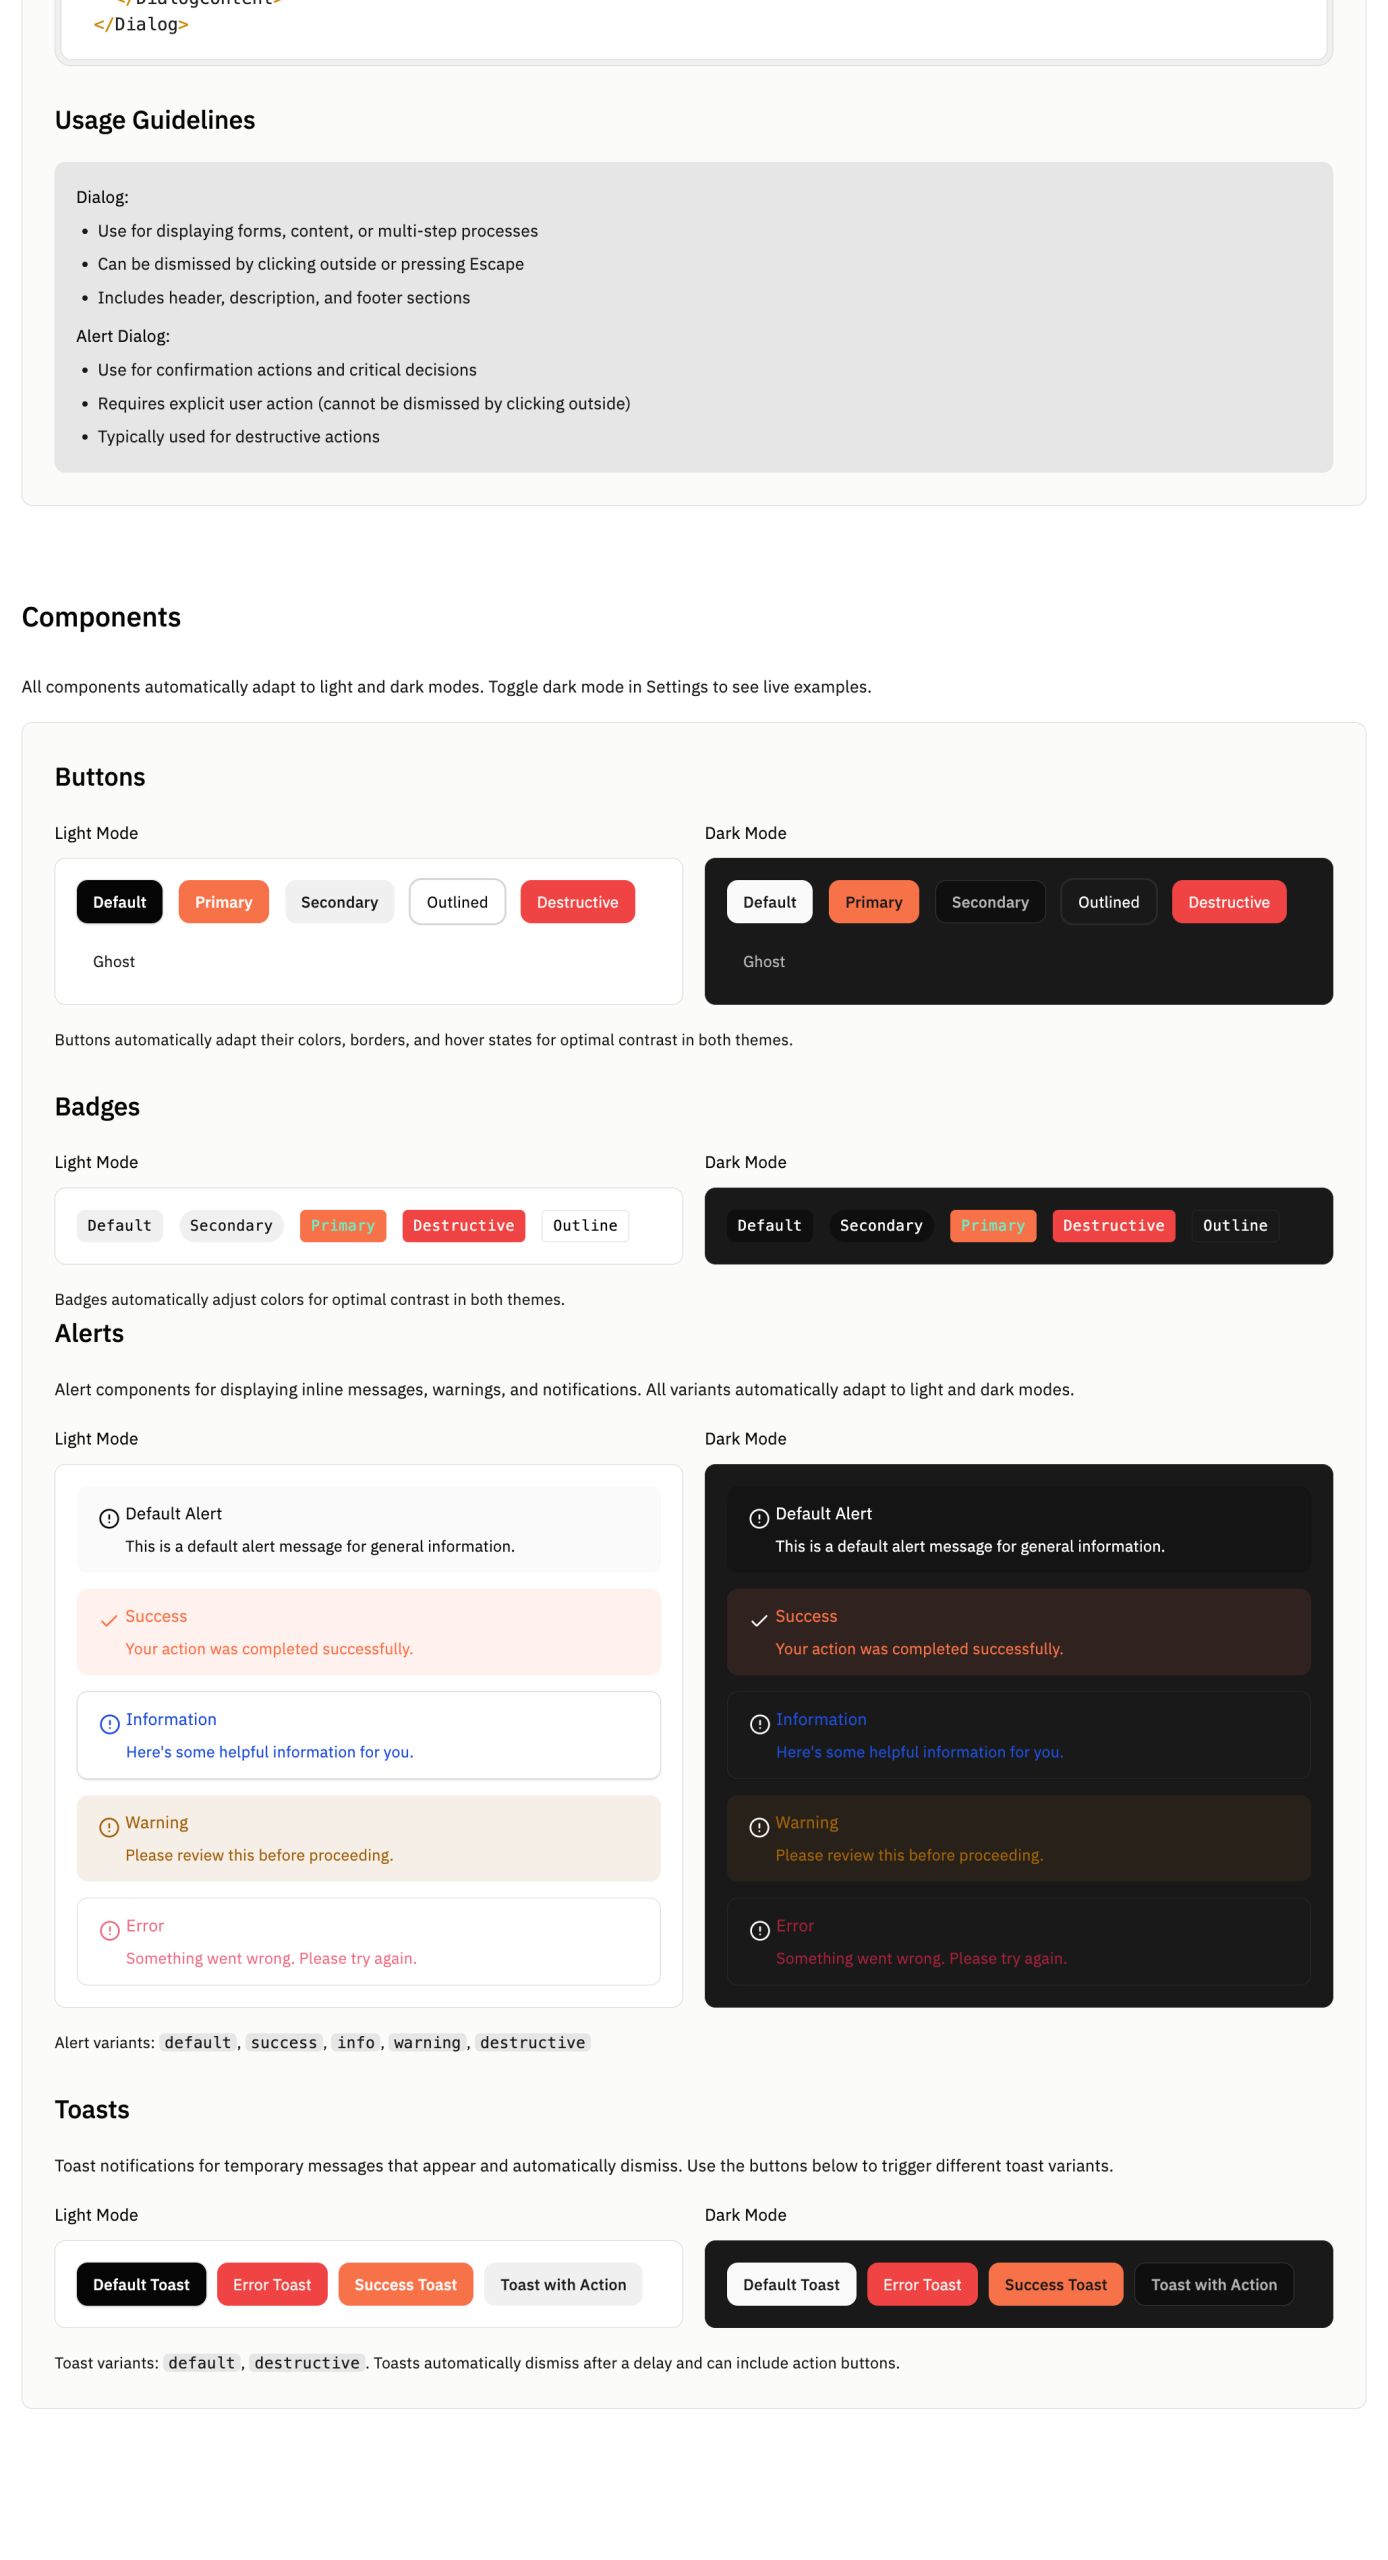
- Live design system page at /design-system that displays:
- All color tokens with light/dark examples
- Typography scales
- Component variants
- Animation keyframes
- Interactive examples
The Workflow in Practice
1. Define a color token:
--primary: 14 93% 63%;2. Use it in Tailwind config:
primary: {
    DEFAULT: 'hsl(var(--primary))',
    foreground: 'hsl(var(--primary-foreground))',
}
3. Build a component:
<Button variant="primary">Click me</Button>4. Document it automatically:
The design system page reads the token definitions and displays them with live examples.
Advantages of Code-to-Design
1. Faster iteration
Change a token and see it update across the app and documentation.
2. No handoff friction
Design and implementation happen in the same place.
3. Always in sync
Documentation reflects the current code.
4. Better collaboration
Developers can contribute design decisions directly in code.
5. AI-friendly
AI tools can generate and modify design tokens and components quickly.
6. Version control
Design decisions are tracked in git.
When to Use Each Approach
Use Design-to-Code when:
- Working with dedicated designers
- Need high-fidelity mockups for stakeholders
- Design exploration requires visual iteration
- Brand guidelines need formal documentation
Use Code-to-Design when:
- Small teams or solo developers
- Rapid prototyping
- Using AI-assisted development
- Building internal tools or MVPs
- Design system needs to stay in sync with code
Best Practices for Code-to-Design
1. Start with tokens
Define colors, typography, spacing, and other tokens first.
2. Use CSS variables
Enable theming and runtime changes.
3. Build component primitives
Create base components (Button, Input, Card) before complex ones.
4. Document as you build
Generate documentation from code, not separately.
5. Leverage TypeScript
Type your variants and props for safety and autocomplete.
6. Make it interactive
Show live examples in your design system page.
The Future of Design Systems
As AI tools improve, code-to-design becomes more practical:
- Generate entire design systems from prompts
- Iterate on design tokens conversationally
- Create components that match design intent
- Maintain consistency automatically
The design system becomes a living, breathing part of your codebase, not a separate artifact.
The code-to-design workflow flips the traditional process. By building design systems in code with AI assistance, you can:
- Move faster
- Stay in sync
- Reduce friction
- Create better developer experiences
Tools like Cursor make this approach accessible. You can build a complete design system in code, generate documentation automatically, and iterate quickly—all without opening Figma.The future of design systems isn’t in static design files—it’s in code, version-controlled, type-safe, and always up-to-date.Try it: Start with a few design tokens, build a component, and watch your design system come to life in code.

You can check dynamic design system.
https://llm-talk-five.vercel.app/design-system